Admin Control Panel

Posts Change Layout Sign Out
Showing posts with label Jenni Bowlin. Show all posts

Oct 9, 2013

Documenting Disney

I've been collecting supplies to create a mini album to document our recent trip to Disney World & thought I'd share.  I wanted a simple system - something that I know would be easy to put together.  I knew that there was no way I would be creating dozens of layouts, so I decided to go with a "pocket scrapbooking" design.

Simple Stories just released this new collection called Say Cheese & I think it's perfect!  Since we have boys, I didn't want anything with Disney Princesses or the color pink... and, since my boys are 8 & 12, I wanted something that wasn't too juvenile, but still fun.

Here are some pictures of some of the pieces in the collection:

I thought this alpha sheet was really cute.  I love the Disney-like fonts & the variety is really awesome!
 These are the 4"x6" & 3"x4" cards that slide into the pocked page protectors.  It makes documenting so easy!


So... last night, I was researching albums & having a hard time finding exactly what I wanted.  And then, it came to me!  I ordered Studio Calico's December Daily kit & it comes with this awesome mini album:

The embossed stars are just perfect!  Of course, the binder would be perfect for my Dec Daily album, but I decided to order the Magical Handbook to use for it instead.  Now all my ducks are in a row & I can't wait to get started.

I also have some of these embellishments by Jenni Bowlin that I thought would be fun for the Disney album:

And these Two Peas exclusives are also perfect!  These stars come in several different colors.
 And this wood veneer card fits perfectly in a pocket page as well.
So... if you're like me & are wanting to document your family's vacation memories, I hope this gives you a few ideas on where to start.

Now to print the 1000 photos we took.  Sigh.... :)

May 31, 2012

Two Peas Garden Projects: May

I've had so much fun creating cards for Two Peas this month!  Here are the projects that are new to my gallery for May.  (All supplies can be found by following the links under each card.)


I've noticed that I reach for wood veneer all the time these days!  These banners from Studio Calico are perfect to stamp on or cover in patterned paper.


This adorable traveller stole my heart last winter at CHA & I'm so happy to finally get to use this chipboard on some of my projects.  I used a Two Peas exclusive Studio Calico stamp for my sentiment.


This is a mix of Amy Tangerine's Sketchbook collection & Dear Lizzy's Neapolitan line.  (Love that polka dot vellum!) Of course, I had to add a bit of wood veneer.  See - I told you!  I'm obsessed!


I love how this card turned out!  It's a perfect anniversary card because it's not too girly to give to my hubs.  And yes - more veneer.  I am also obsessed with the bathroom people icons.  xoxo


This one was another fun card to make.  I used a big background stamp from Studio Calico & strips of washi tape.  Oh... and some wood veneer stars.


This is the card I made for a Finally Friday tutorial.  Make sure to watch to see how I made a cool envelope using a glassine bag.

Feb 11, 2012

Blue Ribbon Banner Card & Video Tutorial

Now that CHA is over, I'm trying to catch back up & share some of the projects I've made recently.  This is a card I made for my most recent Finally Friday video for Two Peas.  You can find more information about this project HERE.

I am completely in love with the new Blue Ribbon punch by Jenni Bowlin!  It makes the cutest embellishments & can be used in so many different ways.  Here's one fun way to use this tool:

     Pin It


You can watch the video above for a complete tutorial.


The birds from Lawn Fawn's Bannerific set were the PERFECT size to hold my banner in place.  ;)


Card Supplies: (click on photos for links)

Jan 22, 2012

Two Peas Gardeners' Digest


Welcome to the Gardeners' Digest!  The Gardeners' Digest is a monthly update from the Garden Girls, the design team at Two Peas In a Bucket.  You can hop from one blog to the next (beginning with Two Peas' Garden Girl blog) to see inspiring projects, sneak peeks, and fresh product picks.  You might even find a give-away or two, so make sure to read each post carefully.  ;)
Here's a project I've made recently using some of my favorite products:

    Pin It
I am completely obsessed with the new Chap collection by American Crafts.  It's full of great patterns that can be used for masculine projects, but is so universal that it could be used for almost anything.

I've jumped on the Project Life bandwagon & am using the Chap line right now in lieu of purchasing specific PL products.  I'm going with a very carefree, whimsical approach & plan on changing up my supplies on a constant basis.
Speaking of Project Life, have you seen the new 2012: Captured series by fellow Garden Girl Lisa Truesdell at Two Peas?  If you've ever thought about doing PL, or even if you'd like to learn more, you would LOVE Lisa's free class.  I love her style of doing PL & I can't wait for this week's lesson!


Even before I was a Garden Girl, Two Peas has always been my one-stop shop for paper crafting supplies.  I love that they carry the latest & greatest... and I love the free shipping options.  :)  ***This month's free shipping code for orders $50+ is: NY2012
Each of the Garden Girls are sharing their top 5 product picks for this month.  Here are some that make my heart go all pitter patter:


1. American Crafts Chap Just Write Journaling Cards - I'm using these right now instead of the Project Life cards.  They fit the page protectors PERFECTLY!  The colors and designs are perfect for my very testosterone driven household.  The pack includes 24 frames & journaling cards (3" x 4", 4" x 6", + smaller banner/title cards.)

2.  Fiskars Jenni Bowlin Blue Ribbon punch - This has to be THE cutest tool I've seen in a long time. Of course, you can make blue ribbons with it, but it's perfect for banners too!  I'll show you more in my Finally Friday Video this week!

3. Smash Date Stamp - this stamp is perfect for Project Life!  I love adding a quick date to my pages!

4. Crate Paper's Paper Heart collection - my favorite Valentine's day collection!  The designs can be used all year long & are GORGEOUS!

5.  Tim Holtz Tiny Attacher - I use this tool on a daily basis!  It's perfect for securing washi tape, ribbon, & can be used alone as a design element.  Trust me on this one.  You need this tool.  :)

From here, make your way to Kimber McGray's blog!  xoxo

Nov 21, 2011

Silhouette Review & Advent Calendar

As some of you may already know, I recently became the proud owner of a new Silhouette Cameo die cutting machine.  Now that I've had a little time to get acquainted with my new "toy", I thought I'd do a little review & show you a project I recently made.  


This is going to be a pretty lengthy post, so you might want to grab a cup of coffee and cozy up in a comfy chair for a few minutes.  ;)

After you read my post, you might want to head over to the Paper Crafts Connection blog where you can be entered to win your very own Silhouette Cameo!!!

First of all, I want to be upfront & tell you that before now, I've never used a Silhouette.  I've learned a lot over the past few weeks, but I am by no means an expert!  My first hands on experience with this machine was at CHA this past summer & I quickly became enthralled.  Here are some of the things that really drew me in:

1. There are no cartridges involved!
I've used machines in the past where I've had to purchase expensive cartridges just to get my hands on one or two images that I wanted to use.  I like to work on the fly & driving to a store or waiting for the post to deliver a cartridge was just not very feasible.  Plus... I get bored easily & like to use new products whenever possible.  After I used a few of the images on the cartridge, they began to collect dust.  I love that this die cutter works directly with my computer.

2.  The Silhouette library is very extensive and the images are fresh and trendy!
The online store is accessible by downloading the free Silhouette software.  Each Tuesday, a FREE shape of the week is available for download.  (You can download the software here or use the disc that comes with your new machine.)  Before my Silhouette had even arrived, I already had several images in my library because I took advantage of the free images that were available.

The Silhouette software includes several other free images that are included as part of your download.  There are images for most seasons & several basic images that I've already used many times.

New images are designed weekly, so there is always something new and fresh to check out.  Most images cost 99 cents to download, but you can also purchase a subscription and get your images at a much lower cost.

3.  The Silhouette Cameo cuts at a full 12".  
I debated on getting the original Silhouette, but decided that I would probably utilize the larger size.  I am SO glad I waited because I've found that the wide format is really handy when making 3D items & gifts.

4.  The Cameo does so much more than just regular die cuts.
I can't wait to try cutting my own vinyl wall decor!  The Silhouette can also help you make custom t-shirt designs.  (The fabric starter kit is on my Christmas list for sure!)  You can also print directly from your home computer & then load it into your Silhouette for perfectly cut designs.
  
*********************
There a million and one things I could say about this machine, so I'm going to have to try to keep this somewhat concise & continue to post reviews and information in the future.  So... here are just a few of my thoughts now that I've had a chance to work with this machine:

The software is easy to learn and use.  I watched several YouTube videos to get the basic idea on how to use it, & that helped a lot.  (Nicole Magouirk has some excellent tutorials!)


I've heard others complain in the past about the original Silhouette being very noisy.  The new machine's noise level seems nice and low to me.  My son said it almost sounds like a video game because it makes almost a musical sound as it cuts.


There is only one blade in the new machine.  It is SO easy to use.  You just tell your Silhouette software what product you will be cutting (ie: thick cardstock, medium patterned paper, transparency sheets, vinyl, etc.) and it will automatically adjust itself to the right speed and pressure.  It will also tell you what depth your blade needs to be set.  To change your depth, you just remove the blade and twist using an attached tool.  It's very, VERY easy.  I've never had a problem with my cuts.  Even very fine & intricate designs have come out perfectly!

I also love using other downloaded files with my Silhouette.  Two Peas has several die cut digital kits that are really fun to use.  (I'm linking a few examples below. GSD & .studio files work well.)  You can just tell your Silhouette software to import your files & they are added to your Silhouette library.
OK... so for those of you who have been patient, I have a project to share with you using Silhouette's Limited Edition Advent Calendar.  I've always wanted to have something like this for part of our family's Christmas tradition!  


The advent calendar is $39.99 & comes with a 15" wooden shadowbox & download card.  Once you download the card onto your Silhouette software, you have access to 42 unique files to fill your calendar!  Each file is perfectly sized to fill your shadowbox with unique boxes and drawers - no adjustments are needed!


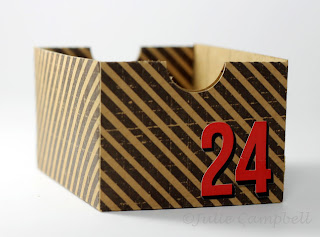
Here are some close-ups of some of the different boxes & drawers that I made.  (Click on pictures to enlarge.)  This is a great project for new Silhouette users!  The program makes it so easy to use.


I hope you've enjoyed learning a little more about the Silhouette Cameo!  I really love this new die cutting machine & can't wait to share more!

Advent Calendar Supplies: (click on pictures for links)

This site has been Tweaked and Designed by Sara Williams | Powered by Blogger | Back to Top
 
Pin It button on image hover