
Admin Control Panel

Posts Change Layout Sign Out
Showing posts with label gifts. Show all posts

Nov 28, 2014

Studio Calico December {Park Ave} Is Here!

I'm back to share some of the projects I created using the new December kits from Studio Calico.  This release has some of the cutest things included & they were so fun to work with.

If you're looking for a quick gift, this handmade desk set might be just the trick!  I used some of the new digital stamp brushes with my Silhouette die cutter & cut out these little cuties from vinyl.
 The notebook is just a kraft Moleskin notebook that I covered with paper from the card kit & a little washi tape from my stash.  The whole project can be finished in under 15 minutes!
 This is another great last minute holiday project.  Shipping tags are a great base for dressing up any gift!  I printed this owl (made from the same digital brush set as above) onto white cardstock & used stamps from some of the new stamp sets to dress it up.  The polka-dot bags are from the card kit & really bring this packaging up to the next level.
 These next two projects were made solely from this month's card kit.  The set isn't necessarily holiday themed, but it's easily alterable to be used for many occasions.
 As I mentioned in an earlier post, I am head over heals in love with Lizzy Mackay's art.  She has stamps found in the Waldorf add-on and the Birthday Stamp set.  Here are a couple of other projects I made with her stamps:
 This card was made with the new Talk Nerdy to Me stamp set.  My husband works at an engineering school and said this stamp set would go over really well there. ;)
These are just a small peek at all of the fun new products that are now available at Studio Calico.  You can find all of the kits & add-ons here.

Happy shopping! :)

Oct 8, 2014

Ashley G Screen Print Tutorial

Do you remember the Ashley Goldberg screen print I mentioned in my previous post? Well... today I had a chance to play with it & I think this little project turned out so cute!

If you've never tried them, it's SUPER easy. It's so easy, in fact, that it only takes ~10 seconds to demonstrate.  Check it out!


I just used some watercolors that I had on hand, but acrylics work great too.  I found this frame at Wal-mart for under $3, so these make very inexpensive gifts (but look like you spent much more on them!)  I hope you give them a try!

*Here's a direct link to the video (The blog seems to cut off some of the text.)

Sep 27, 2014

Halloween Treat Jar Tutorial

I love canning jars.  They're perfect for so many things!  I use them as drinking glasses, flower vases, organizers... and today I'll show you how you can use them to package your Halloween treats.

For this project, I'm using Studio Calico's new Halloween stamp set - in both the acrylic & digital form.  The digi stamps work really well with digital die cutters & I'm using the skull & cross bones image along with my Silhouette.

Open the png file & trace the image.  Once traced, select the image, click on the "Object" tab & then scroll down to select "Release Compound Path."  This allows you to separate the main skull & cross bone image from the outline.

The picture below shows the separated images.  The cut lines on the left are for the outline (which will be cut from black vinyl) and the cut lines on the right are for the main image (which will be cut from white vinyl.)
After you cut each image, remove the excess vinyl.

 Apply transfer tape over each piece.
Apply the black vinyl first & remove the transfer tape.
 Carefully align the white vinyl & apply.
 I always like to dress up the jar lid a bit.  Use the lid as a template & trace & cut out a circle from patterned paper.  (This paper is from The Underground Card Kit.)
 Use the images from the Halloween stamp set to create a tag.  I used a roller date stamp to add a little detail & stamped the word "poison" using Orange County ink.

 These Halloween Oreos are just too cute!  I'm hoping that by packaging them in a spooky jar that my boys won't eat them all.  ;)
 I used the orange twine from the card kit to tie the Evidence tag in place.
These would make adorable gifts for teachers, coworkers & friends (or just keep if for yourself!)  The whole process is really quick & I love the results. I hope you give it a try!


Aug 27, 2014

Paint Dipped Spoons + Canning Jars

A group of my friends get together every month for what we call our "crafty girls' night out."  We all bring some yummy munchies & some sort of craft/project to work on & just enjoy each others company.

I was trying to figure out what craft project I wanted to work on & remembered that my Color Theory acrylic paints had just arrived!
Let me just say, these paints rock!  The colors are so fresh & trendy... and they coordinate with all of the other Color Theory products. I got them with the intention of painting some of my wood veneer shapes (as well as many other things)... and then I had a light bulb moment.

I've seen some adorable painted spoons on Pinterest & decided to try to make them myself.  I bought some wooden utensil sets from the dollar store, packed a handful of colors of paint (Sunny Day, Coral Bay, Mint Hint & Clean Slate), a paintbrush & some washi & I was all set for our g.n.o.
Creating paint dipped spoons are extremely easy.  Here's the rundown:
  1. Apply tape to the utensils to mask the area where you want the paint line to stop.  I used washi tape because it's very easy to remove (and I couldn't find my painter's tape.)
  2. Paint the area of the utensils below the tape line.  I applied 3 thin coats, allowing the paint to dry in between coats.
  3. Spray the painted ends of utensils with a non-toxic sealer.  (I did two coats just to be sure.)
  4. Remove washi tape & reveal your awesome work!
One thing that I really loved about the Color Theory acrylics was how perfect the color remained after removing the tape.  I've removed painter's tape while doing some DIY projects around the house where portions of the paint had dried to the tape & peeled off, leaving a not-so-lovely paint line behind.  Not so with these paints!
These spoons are cute enough to be a gift all on their own (they look much more expensive than the $1 you spent on them) ;) but I thought I'd go a step further & use them as fancy schmancy gift packaging.
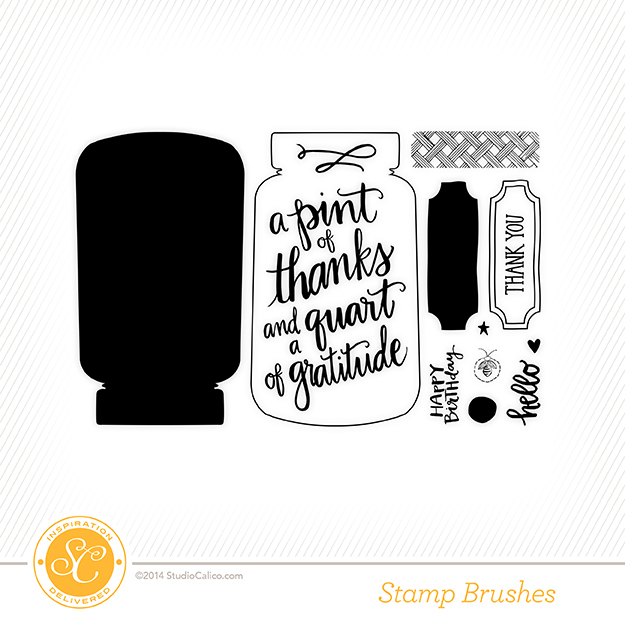
I love canning jars.  Maybe it's because I have so many happy memories of my grandma's canned fruits & vegetables?  I'm not sure... but I was so happy to see these Jar stamps from Studio Calico.
http://www.studiocalico.com/digital/digital-stamp-brushes/poet-society-card-add-on-stamp-2?aff=7ded1832
 I used the digital stamp set, which is great if you have Photoshop or Elements.  You can resize them to fit whatever project you're working on & just print them out onto cardstock or patterned paper.  These digi stamps are only available for the month of September.  (There is also a traditional acrylic stamp set if you're more of an ink & paper crafter.)
I hope you give these painted spoons a try!  Just fill your canning jar with a soup or cookie mix & you've got a thoughtful & adorable gift that anyone is sure to love.

May 13, 2014

Letterpress Recipe Card Tutorial

As I mentioned yesterday, my letterpress supplies have been getting a workout lately.  I LOVE letterpressing from home.  It's so simple & the results are so instantly gratifying.  :)  I can't wait to learn even more in the upcoming online Letterpress Class from Studio Calico.

The new kitchen themed letterpress plates (Recipe Card & From the Kitchen Of) make it easy to create handmade gifts. In this tutorial, I’ll show you how to create a set of letterpressed recipe cards that look like they came from an expensive boutique! I’ll also show you how you can repurpose your Project Life packaging to create a recipe box.
I packaged up a set of letterpress cards along with a simple tea towel & tied them together with twine.

I hope you give letterpress a try!  It's so much fun. 

Jan 14, 2014

A Little Love For Our Four Legged Friends

My son begged to get a dog for years & I kept putting it off.  I had heard stories of how tough it could be to train a puppy, & with two little boys at home, I didn't know if I had the time or energy to welcome a new pet into the family.  Finally, when my oldest was 8, I gave in & let him bring home a 10 week old Boston Terrier.  About 2 minutes after he was came home, I fell head over heels in love for this little guy we named Moses.

That was nearly 5 years ago & I still say getting Moses was the best decision our family ever made.  He has been THE BEST dog & is truly a member of our family.  I mean, really.  Look at this sweet face!  How could you not love him?


So when I saw this exclusive dog kit from Studio Calico, I knew I had to have it!


My kit just arrived & I decided it was a great time to whip up some treats for our little guy.  I followed the recipe for Peanut Butter Dog Treats & cut out the "cookies" with bone & puppy cookie cutters.


The recipe was really easy to follow & my dog completely approved.  He's still staring at me with those puppy eyes, trying to see if I'll give him a few more.

I wanted to store the extra treats in something cute that could sit out on the counter & decided to dress up a canning jar with my new supplies from the dog kit.


I used a couple of the stamps from the set to dress up a shipping tag & heat embossed the images to give them a really bold look.  The washi tape from the kit made it really easy to add a decorative wrap around the belly of the jar.

 If you follow the recipe linked above, you might want to remove smaller cookies about 5-10 minutes early.  (By the way, I love how the dog cookie looks just like a Boston Terrier!)

Although the dog kit above is now sold out, you can find the digital images for sale here.

Or… if you're a cat lover, Studio Calico has just released this adorable Cat Lovers Mini Kit:


Even though I'm a die hard "dog person", I couldn't resist this kit!  Those painted cat clothespins are going to make the cutest gift toppers!  And.. I love how so many of the images from the stamp set can be used for other things.  (I know I'll be using that yarn image to document some of my recent knitting projects!)

These kits are only available to Studio Calico kit subscribers, so if you're interested & haven't subscribed yet, you can sign up for either the Scrapbooking, Card, or Project Life kit & then order your exclusive set.  There are so many perks to being a kit subscriber & I love that these fun exclusives are offered each month.  I can't wait to see what they come up with next!

Dec 27, 2013

Studio Calico Copper Mountain Is Here!

This is just a peek at some of the cool new products found in Studio Calico's January kits.  If you're a subscriber, kits are available for purchase now!  (The kits become available to non-subbers at midnight.)  There are lots of great digital products that have just been released as well.


I think you're really going to love the card kits this month!  If you haven't heard, the Copper Mountain kit comes with a stamp set & coordinating DIE set!  It's so fun!
These are my must-have shop picks for this month:
1. Adhesive Backed Cork Stack - perfect for die cutting your own embellishments!
2. Wire snips - just the tool to use when separating the different images in the metal die set
3. More White Cardstock - 10 sheets of 8-1/2 x 11" cardstock.  It's smooth & perfect for stamping & sturdy enough for card bases as well.

I also really love these Scripture Cards by Lindsay Letters.  I love the words themselves & the chalkboard effect is really fun.  The cards are 4x3", so they're perfect for Project Life or as a card focal point.

Here are some of the projects I made using the new kits.  This one uses just the Copper Mountain Card Kit:
These little felties are so easy to make!  I used the new metal dies from the kit, some felt & a little googly eye from my craft stash.  I'll post a short tutorial for you soon!

This next project is a gift & card all in one!  I used the Spaulding Bowl card kit add-on for this one:


The strip of patterned paper temporarily holds the bookmark in place, but it can slide out easily from the card front.

I have a vintage dictionary that I use to make backgrounds & other embellishments.  I just selected a page that coordinated with my theme & watercolored it using Mister Huey's mist.

This next card uses just the main card kit too.  I love the masculine papers found in this month's kit.
To make the fishing line, I just snipped one of the rain drops stamps to separate it from the group & stamped it repeatedly in a vertical line.  I used it again horizontally to create a border.  I love how the raindrops look like hand stitching.

The stamps are really awesome this month too.  I love that there's a solid & an outline image for the fish.  It makes adding color so easy!

This next card uses one of the new printable images from the digi shop.  I just opened it in my photo editing software & repeated the image to create a background.

Here's the digital printable in it's entirety:
I used the whale metal die once again to cut through several layers on my card front.  I love how strong these dies are!  The sentiment is part of the Spaulding Bowl kit.

I'll be back at midnight with a video I shot while unpacking my kit.  I think it's fun to see things up close & I hope you enjoy it!

This site has been Tweaked and Designed by Sara Williams | Powered by Blogger | Back to Top
 
Pin It button on image hover