Admin Control Panel

Posts Change Layout Sign Out
Showing posts with label organization. Show all posts

Jun 8, 2015

Traveler's Notebook Inserts

As soon as I finished making my Traveler's Notebook cover, I was itching to put it to use!  (You can find the tutorial here.)  I love the basic kraft Moleskine journals that are available... but I didn't want to invest a lot of money into a simple notebook, so I decided to make my own.
I have so many beautiful pieces of patterned paper that I've been hoarding from my Studio Calico scrapbooking kits & it was time to put them to use!

It's so easy to make your own notebook inserts!
  1. Cut a piece of patterned paper & fold it in the middle.  This is now the cover of your notebook.
  2. Fold several sheets (I used ~10) of loose leaf notebook paper or grid paper in half.  Don't worry about cutting them to size quite yet.
  3. Place the paper inside of the notebook cover, lining up the center crease.
  4. Use a long reach stapler to secure paper together.  You can also hand-stitch or machine stitch the crease.
  5. Fold the notebook and trim away the paper that extends beyond the journal cover.  You can use a heavy duty paper trimmer or a straight edge ruler/blade.
If you want to secure more than two journals inside of your Traveler's Notebook, you'll need to add an extra elastic loop around the middle page of your notebook and the spine.  I used leftover elastic cord, but you can also use large rubber bands.  Once you have this loop in place, you can slip a second journal onto the elastic that's on the outside spine of the first journal.  Now both journals can slide under the elastic that's part of the leather cover. (This sounds tricky, but it's super simple.  If you need a visual, there are a lot of videos available on YouTube.)

Now that I've completed a few journals, I think I might make some modifications for next time.  Instead of stapling the inside paper onto the {hoarded} paper cover, I think I'll staple just the paper and then place the cover around the bound pages.  The elastic will hold the cover & paper together & when my pages are full, I can simply remove them and insert a new set of pages without having to discard my pretty covers.
My first notebook will be used for menu planning & grocery lists.  The second is for jotting down notes & the third will be an expense/mileage tracker.

These planners can be used in so many different ways & I love how they can be customized so easily.   


Mar 2, 2015

I'm a teacher with Big Picture Classes!

I'm so excited to be able to share a little secret that I've been keeping! I'm one of the newest teachers at Big Picture Classes!
Have you seen the new Big Picture Classes website yet?  It just launched this weekend and it's amazing!  If you're not familiar with BPC, it's an online learning platform for all things crafty.  You'll find classes on scrapbooking, cardmaking, DIY crafts & much more!

With the new platform, you can sign up to become a member for only $9.99 a month & you'll have unlimited access to all of the classes on the site.  New classes will be added to the site all throughout the year, so it's a really great resource.  You can even try out a free trial risk free.
I'm teaching a series called Postmarked.  It's a card making class with a focus on getting your cards in the mail.  Each month, I'll be sharing new cardmaking techniques, challenges, and ideas to help keep us inspired. In the first class, we’ll even be making a card organizer to hold everything we need to take our cards from idea to postmarked!
In this first class, you'll find 4 video tutorials, PDFs, and free downloads to help you complete your card organizer.  I'll also show you some fun & simple watercolor techniques that anyone can do so that you can start sending out happy mail!
At BPC, you'll also find a community page where you can connect with other students.  There's a group called Postmarked Pals where you can share ideas on creating handmade cards, stationery, and happy mail of all kinds. You might even find a new pen-pal!  I hope you check it out.

If you'd like to start making handmade cards of your own to send to your family & friends, I'd love for you to join me in this class series.  You can find out more about Postmarked here.  Hope to see you in class!

Sep 1, 2014

Stay Organized With Style {Agenda - a new online class)

Day planners, Filofax... there all the rage right now.  If you've ever wanted to learn how to stay organized with style, you'll definitely want to check out this new class called Agenda, taught by Marcy Penner for Studio Calico!
And, while supplies last, you'll receive this exclusive stamp set.  It ships free, no matter where you live!  I'm seriously thinking about signing up for this class just for this set.  I love it & know that I can use it for so many things!
Marcy also designed some fun products that would work great with your planner (or Project Life album, etc.)
http://www.studiocalico.com/shop/agenda?aff=7ded1832
You can purchase them as a bundle right now for 40% off, or buy them individually.
I really like the new washi tapes in the shop!
...and these banner stickers are super cute!

BY ENROLLING IN THIS CLASS YOU'LL RECEIVE :

  • PDF lessons covering everything from setting up your planner to making it functional for you, all while adding your own style and flair to its pages.
  • Three videos from Marcy Penner
  • A peek into each of the contributor's planners, as well as insight into how they organize and decorate them.
  • Digital files from Hello Forever designed for your planner (coming soon)

Class Syllabus :

  • Planner Set Up
  • Inserts - Pockets, Bookmarks and Dividers
  • Dashboards
  • Bullet Journaling
  • Ideas for using your planner to stay organized
  • Decorating

What You Need :

  • Any style of planner or mini binder
  • Your favorite calendar and notebook inserts
If this sounds like something you would enjoy learning more about, you can check out the new Agenda class & register in the Studio Calico Classroom.

Jul 25, 2014

Don't Miss These Upcoming Online Classes!

I wanted to tell you about two great glasses that are coming up at Studio Calico.

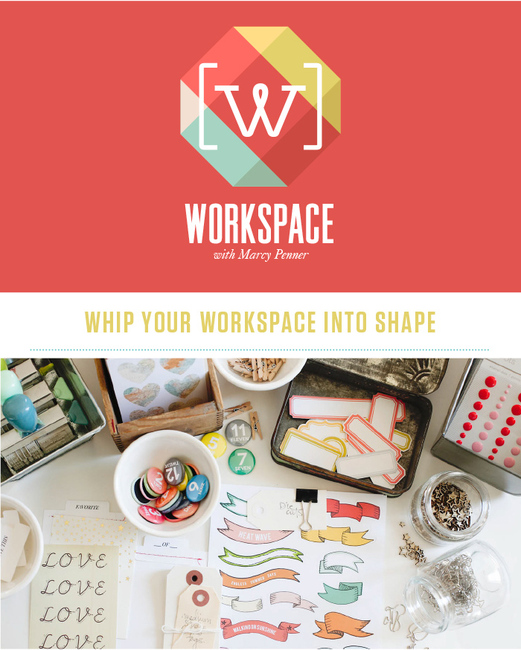
Workspace is the first class of it's kind.  Throughout the month of August, class members will learn new ways to organize their craft space & have it work for them.  I registered immediately & can not wait for this class to start!
http://www.studiocalico.com/shop/classrooms/workspace?aff=7ded1832
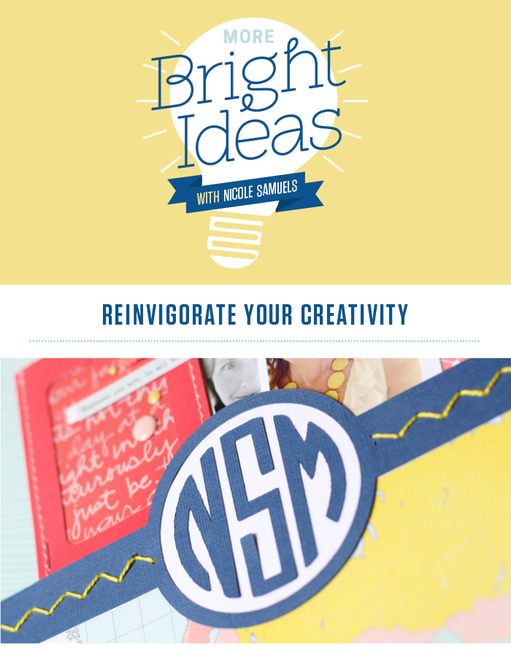
The second class that's registering right now is More Bright Ideas.  I took Nicole Samuels' first class (Bright Ideas) and learned so much!  I love that she's back and I can't wait to see what she has in store.  This class is only $5 (Yes.  That's not a type-o.) so you'll definitely want to check it out!
http://www.studiocalico.com/shop/classrooms/more-bright-ideas?aff=7ded1832 
There are just a few days left to register for the August classes.  You can find more details for each class here.  Hope to see you in the classroom!

Jul 2, 2014

Project Life® Bits & Baubles Box + Free Download!

I subscribe to Studio Calico's Project Life® kits, so each month a beautifully curated box of craft supplies arrives at my doorstep.  Of course, the box contents are crazy amazing, but the box makes my heart go pitter patter all by itself!

It's extremely well made, sturdy, and has a strong magnetic closure.  It's just too perfect to throw away!  I've re-purposed them in a variety of ways.  I've turned them into travel kits, greeting card gift sets, first aid kits, recipe boxes, paper doll sets & more.

But today, I wanted to show you how perfect they are for organizing all those little bits & baubles that you collect.  I'll share a free cut file that you can download to create dividers for the inside of the box.   I've used this box to organize some of my smaller kit supplies, but I think it would make a great jewelery box too.

This is what a Project Life® box looks like.
 
I've covered it with patterned paper in the past, but I decided to spray paint it this time & I loved the results!  (I prefer Valspar's flat paint/primer in one.)
 Now you've got a blank slate to work with & you can decorate the box or leave it as is.

I covered my box with some of my favorite paper of all time.  (Studio Calico's Color Theory pack.)  It comes with the little faux paper strips already printed on the paper, making a perfect spot to add my text.
 I used another sheet of Color Theory paper along with my Silhouette to create the dividers for the inside of the box.  (You can download the files here.)

The file will automatically cut your score lines, so you'll just need to make mountain & valley folds to create each section.  Please let me know if you have any trouble figuring out how it goes together.
 ... and there you have it!

I hope you enjoy creating your own bits & baubles box!  Enjoy!

Jul 1, 2014

DIY Project Life® Sorage Tin

I love re-purposing things.  I started (probably out of necessity) as a little girl & it still gives me warm fuzzies to this day. 
 Have you seen these organizers from Land of Nod?  I've always thought they were really cute & they were the inspiration for this DIY project.

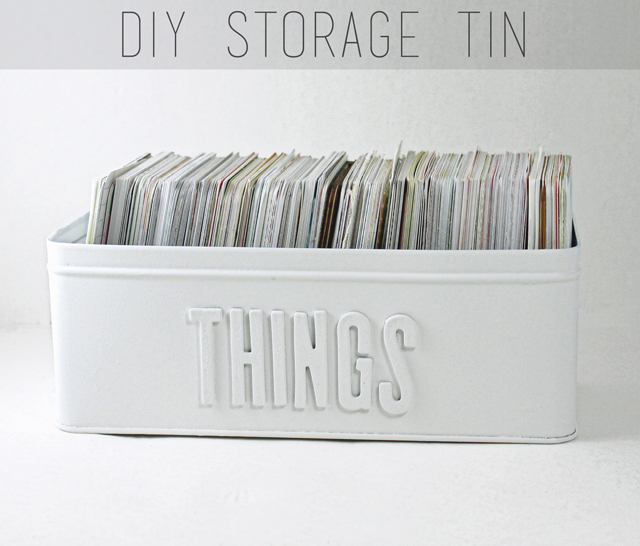
I'm a newly converted tea drinker & went through this tea tin quickly this winter.  I loved the shape of it though & decided to hold onto it just in case I could use it for something later.  I'm glad I did, because it ended up transforming into a perfect storage tin for my craft space!
 To begin with, I used a flat spray paint/primer-in-one to cover the tin & paint it white.  Valspar is my favorite brand, but Krylon works really well too.

I loved the scale of these alphabet stickers from a previous Studio Calico kit & applied them directly to the tin.
 Once my letters were in place, I applied a couple additional coats of paints & voila!
The tin is the perfect size for holding 3x4" Project Life® cards... but of course, could be used to hold any of your things.  (Hence the name.)

I have a new obsession with spray paint.  It's seriously the Duct Tape for crafters!

Feb 20, 2014

My New *Awesome* Washi Tape Organizer

I love crafty organization *almost* as much as the products themselves.  ;)  One of my current obsessions right now is washi tape.  I've had a few different storage ideas for it over the years, but as my collection has grown, I needed to make some changes.

I wanted a storage solution where I could quickly see what color/style options I had available at a glance.  My tapes were previously all thrown into a large bin... and it worked ok, but I always had to dig around for a little while & I never really knew what I had for sure.

I saw this spice rack on Amazon & I decided to give it a try.  (I got the largest one they offered, but there are several smaller versions available if your collection isn't quite as large or if you don't have the space.)
http://tinyurl.com/le5jkfe
Here's a video clip of my washi storage in action.  I love how the drawers slide out & can click down to an angled view.  It makes it nice when you're working with a color family and want to select different tapes while you're working on a project.

 http://tinyurl.com/le5jkfe
I'm so in love with my new washi storage!  I think it's just perfect & hope it gives you some ideas for your own storage needs.

This site has been Tweaked and Designed by Sara Williams | Powered by Blogger | Back to Top
 
Pin It button on image hover