


I've been looking for ways to better organize my life, especially with the launch of my new business this summer. I need a simple way to keep track of expenses, organize receipts, create shopping lists, jot down new ideas, etc. and I think a Traveler's Notebook is going to be a perfect fit!
If you're not familiar with a Traveler's Notebook, it's basically a leather cover with elastic bands that you can fill with multiple notebooks, journals, folders, etc. The original cover is called a Midori & other versions are sometimes referred to as a Fauxdori or Traveler's Notebook (TN.)
Studio Calico just announced a new online workshop called Everyday Traveler that explains the process & provides several unique ideas for utilizing this type of organizer. The class kit also comes with a free stamp set (while supplies last) & they have several new products in the shop that work well in these types of planners. There are even printable journal inserts made specifically for these notebooks. Don't forget to use the coupon code below! Registration is open until June 30th and class begins on July 6th.


Some people use the Traveler's Notebook to document their travels (hence the name) but these organizers can be used for almost anything. As I mentioned earlier, my first TN is going to be used to help me keep track of my business, but I'm planning on making a second one to use alongside my Illustrated Faith bible journaling (separate notebooks for a prayer journal, favorite verses, sermon notes, etc.)
After researching Midoris & Traveler's Notebooks, the only thing holding me back was the price. Most covers retail for $35+ and knowing that I wanted to have at least a couple organizers, I decided to make my own.

I purchased an 8-1/2" x 11" piece of tooling leather and decided to keep the size exactly as it came. The actual Midori organizers are just a hair smaller, but I wanted the extra room to accommodate several notebooks and tabs if I chose to use them.

You can keep the corners "as is" or if you have a Corner Chomper, you can round the corners really easily.

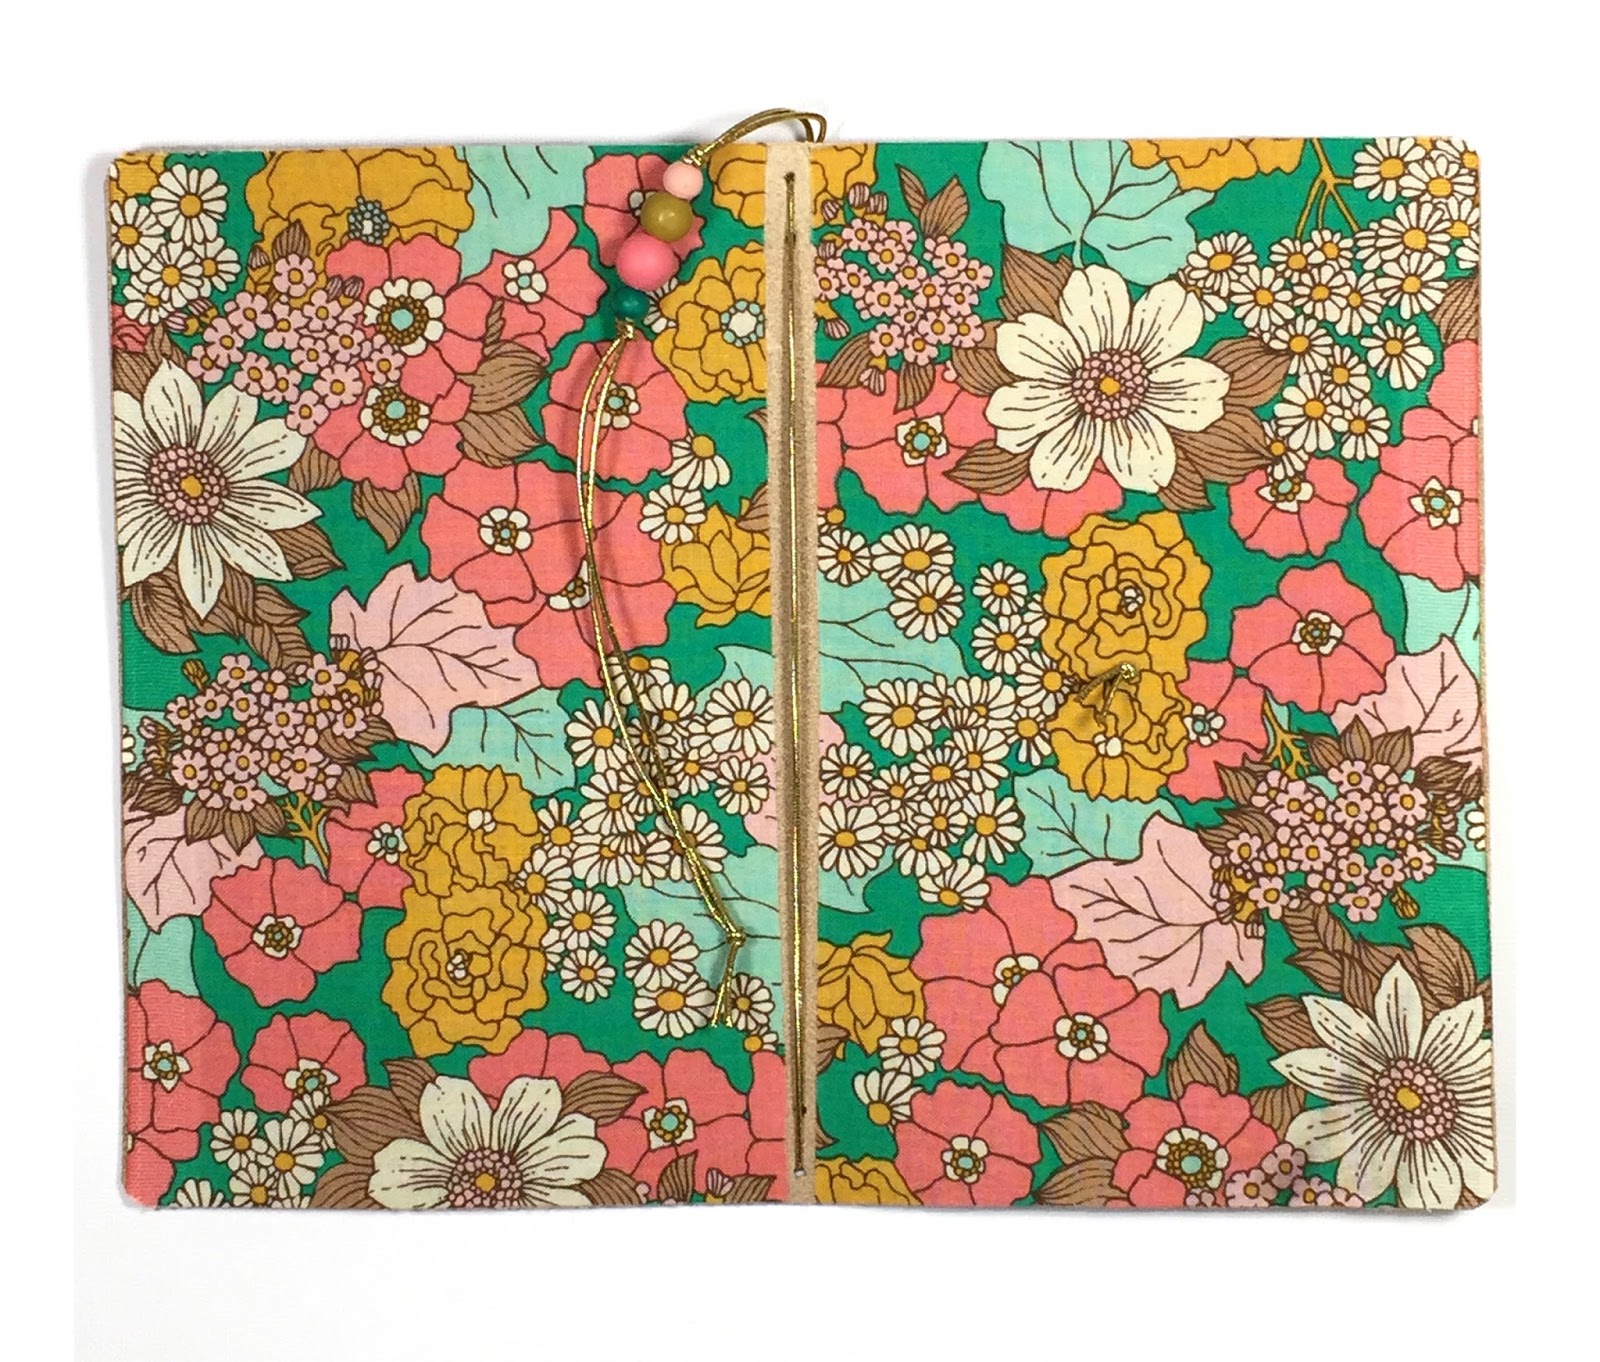
I like color & decided to bring in a little more personalization with fabric. (This fabric is Joel Dewberry's Bungalow.) I cut (2) 8-1/2" x 5" pieces and applied Heat n Bond. (This is basically double sided adhesive for fabric that you apply with an iron.)

Follow the package directions & iron the fabric onto the inside of the notebook. I left some space in the middle because I didn't want my fabric to accidentally buckle/ripple when I closed the organizer.

Find the center of the back flap of your organizer and create a hole through the leather using an awl or nail. Starting from the inside, thread a piece of elastic cord through the leather & back to create a loop. (I left a long tail and stretched the elastic around my organizer to determine the appropriate length.) Tie a knot and trim the ends of the elastic. *Elastic cord is very inexpensive (mine was $1.99) & can be found in any craft & hobby shop.


Using a ruler, measure and mark two holes on each end of your organizer. (Mine were 1/4" & 3/4" on the center.)

Punch holes to create the placement for the elastic bands in the center of your organizer. I used a rotary punch, but you could also use an awl/nail again. I do think the punch works really well & gives the TN a very professional appearance. If you're going to make several of these, it might be worth the investment.

Thread elastic cord through the top hole starting from the front of your TN and then through the bottom hole.

Come back up through the remaining hole on the bottom and through the remaining hole on the top.

The ends of your cord should be coming out the top front of your TN. You'll want to pull the cord somewhat snug until the leather just starts to curve upward. (It will straighten out once closed, but this will allow your journals to be held in place.)

You can tie off your elastic now & call it a day... or you can add some customization. I decided to paint some wooden beads to coordinate with my fabric. (I used a combination of Studio Calico's Color Theory paint, Liquitex heavy body, & Bear latex paint for these.) Just use whatever you have on hand... but if you happen to have Liquitex paints, they are definitely my favorite!

I tied my beads in place and kept my elastic long in case I wanted to use it as a placeholder later.


If you feel like your organizer is a little stiff or isn't folding as well as you'd like, just spritz the entire cover with a little water & let it absorb. This makes your leather much more pliable. Just fold & place a heavy object on it for about 10 minutes. I love how my TN turned out. It feels very sturdy, yet soft to the touch.

After I was finished with my organizer, I decided that I wanted to personalize it a bit. I had some leather labels from this Inspirational Stamp Set (metal stamps that leave impressions in leather) and used Melody Ross' metal alphabet stamps to add my name. I love it when I have things like this on hand! It adds so much without adding any cost to the project.
I did have to untie my center elastic so that I could thread my name label onto it, so if you want to add anything onto your center cord, you might want to plan ahead and save yourself a step. ;)

When using metal stamps, make sure to wet your leather first & let the leather soak in the water for a couple of seconds. This will allow the leather to accept the impressions much more easily.

I couldn't be happier with how my traveler's notebook turned out & I hope you give it a try!
In my next blog post, I'll show you how to make your own notebook inserts to fill up your organizer.


very cool, Julie!
ReplyDeleteI've made a couple of these myself and I LOVE how yours turned out:)) great job!! You've put me in a mood to go make another one !! Thank you for the inspiration!! -lisa-
ReplyDeleteI've made a couple of these myself and I LOVE how yours turned out:)) great job!! You've put me in a mood to go make another one !! Thank you for the inspiration!! -lisa-
ReplyDeleteLove your Midori, could I ask for some clarification? What weight of leather do you use, i.e. thickness? Also, what size elastic cord did you use? I've tried 2mm, not too successful! I would really appreciate any help you can give, thanks.
ReplyDelete