Admin Control Panel

Posts Change Layout Sign Out
Showing posts with label DIY. Show all posts

Jun 10, 2015

Take a Peek at Postmarked 02 - My Newest Class from Big Picture Classes!

I'm excited to share a peek into Postmarked 02, my latest online class in the Postmarked series from Big Picture Classes!

BPC is an amazing online source for creative education.  You'll find classes on card making, scrapbooking, photography, DIY, and more!  The site is a membership, meaning - you pay a small fee each month & have access to the full library of classes.

For a short time, you can take my class FOR FREE!  Find out more below.
I really think you're going to love what's in store for Postmarked 02!

In this class, I'll show you how to make a customized stationery set that's full of color!  Learn how to revitalize supplies you have on hand with a dye bath and create beautiful cards that have been dip dyed.

The class comes with free templates to make handmade envelopes & a stationery box.  These sets are just gorgeous and make perfect gifts!  The templates come in both pdf & .studio files for the Silhouette Cameo.

I'll also show you techniques for creating monogrammed cards through dry embossing & hand embroidery.

One of my favorite things about this class is that you can use whatever supplies you have on hand!  It's a great way to revitalize your stash & create projects that fit your own unique style.

-------------------------------------
So, are you ready to check out Postmarked 02?  For a limited time, you can take my class & any class at BPC FOR FREE!

Use the code: BPCJULIE to get a free one month trial membership to the site.

*Free month trial promotion ends August 22nd, 2015 at 11:59 pm EST. First month free offer valid only on new memberships and is not valid for current or previous members. Click the “Start Your Free Trial” button and follow the steps to begin your free trial.  Enter promo code in promo box and continue checkout process. Not valid on previous purchases. Must enter promo code at checkout. Refunds will not be issued for misused or non-entered codes. 
-------------------------------------

I hope to see you in class!

Jun 8, 2015

Traveler's Notebook Inserts

As soon as I finished making my Traveler's Notebook cover, I was itching to put it to use!  (You can find the tutorial here.)  I love the basic kraft Moleskine journals that are available... but I didn't want to invest a lot of money into a simple notebook, so I decided to make my own.
I have so many beautiful pieces of patterned paper that I've been hoarding from my Studio Calico scrapbooking kits & it was time to put them to use!

It's so easy to make your own notebook inserts!
  1. Cut a piece of patterned paper & fold it in the middle.  This is now the cover of your notebook.
  2. Fold several sheets (I used ~10) of loose leaf notebook paper or grid paper in half.  Don't worry about cutting them to size quite yet.
  3. Place the paper inside of the notebook cover, lining up the center crease.
  4. Use a long reach stapler to secure paper together.  You can also hand-stitch or machine stitch the crease.
  5. Fold the notebook and trim away the paper that extends beyond the journal cover.  You can use a heavy duty paper trimmer or a straight edge ruler/blade.
If you want to secure more than two journals inside of your Traveler's Notebook, you'll need to add an extra elastic loop around the middle page of your notebook and the spine.  I used leftover elastic cord, but you can also use large rubber bands.  Once you have this loop in place, you can slip a second journal onto the elastic that's on the outside spine of the first journal.  Now both journals can slide under the elastic that's part of the leather cover. (This sounds tricky, but it's super simple.  If you need a visual, there are a lot of videos available on YouTube.)

Now that I've completed a few journals, I think I might make some modifications for next time.  Instead of stapling the inside paper onto the {hoarded} paper cover, I think I'll staple just the paper and then place the cover around the bound pages.  The elastic will hold the cover & paper together & when my pages are full, I can simply remove them and insert a new set of pages without having to discard my pretty covers.
My first notebook will be used for menu planning & grocery lists.  The second is for jotting down notes & the third will be an expense/mileage tracker.

These planners can be used in so many different ways & I love how they can be customized so easily.   


Jun 7, 2015

DIY Midori-Style Traveler's Notebook Tutorial

 I've been looking for ways to better organize my life, especially with the launch of my new business this summer.  I need a simple way to keep track of expenses, organize receipts, create shopping lists, jot down new ideas, etc. and I think a Traveler's Notebook is going to be a perfect fit!

If you're not familiar with a Traveler's Notebook, it's basically a leather cover with elastic bands that you can fill with multiple notebooks, journals, folders, etc.  The original cover is called a Midori & other versions are sometimes referred to as a Fauxdori or Traveler's Notebook (TN.)

Studio Calico just announced a new online workshop called Everyday Traveler that explains the process & provides several unique ideas for utilizing this type of organizer.  The class kit also comes with a free stamp set (while supplies last) & they have several new products in the shop that work well in these types of planners.  There are even printable journal inserts made specifically for these notebooks.  Don't forget to use the coupon code below!  Registration is open until June 30th and class begins on July 6th.
Some people use the Traveler's Notebook to document their travels (hence the name) but these organizers can be used for almost anything.  As I mentioned earlier, my first TN is going to be used to help me keep track of my business, but I'm planning on making a second one to use alongside my Illustrated Faith bible journaling (separate notebooks for a prayer journal, favorite verses, sermon notes, etc.)

After researching Midoris & Traveler's Notebooks, the only thing holding me back was the price.  Most covers retail for $35+ and knowing that I wanted to have at least a couple organizers, I decided to make my own.
 I purchased an 8-1/2" x 11" piece of tooling leather and decided to keep the size exactly as it came.  The actual Midori organizers are just a hair smaller, but I wanted the extra room to accommodate several notebooks and tabs if I chose to use them.
 You can keep the corners "as is" or if you have a Corner Chomper, you can round the corners really easily.
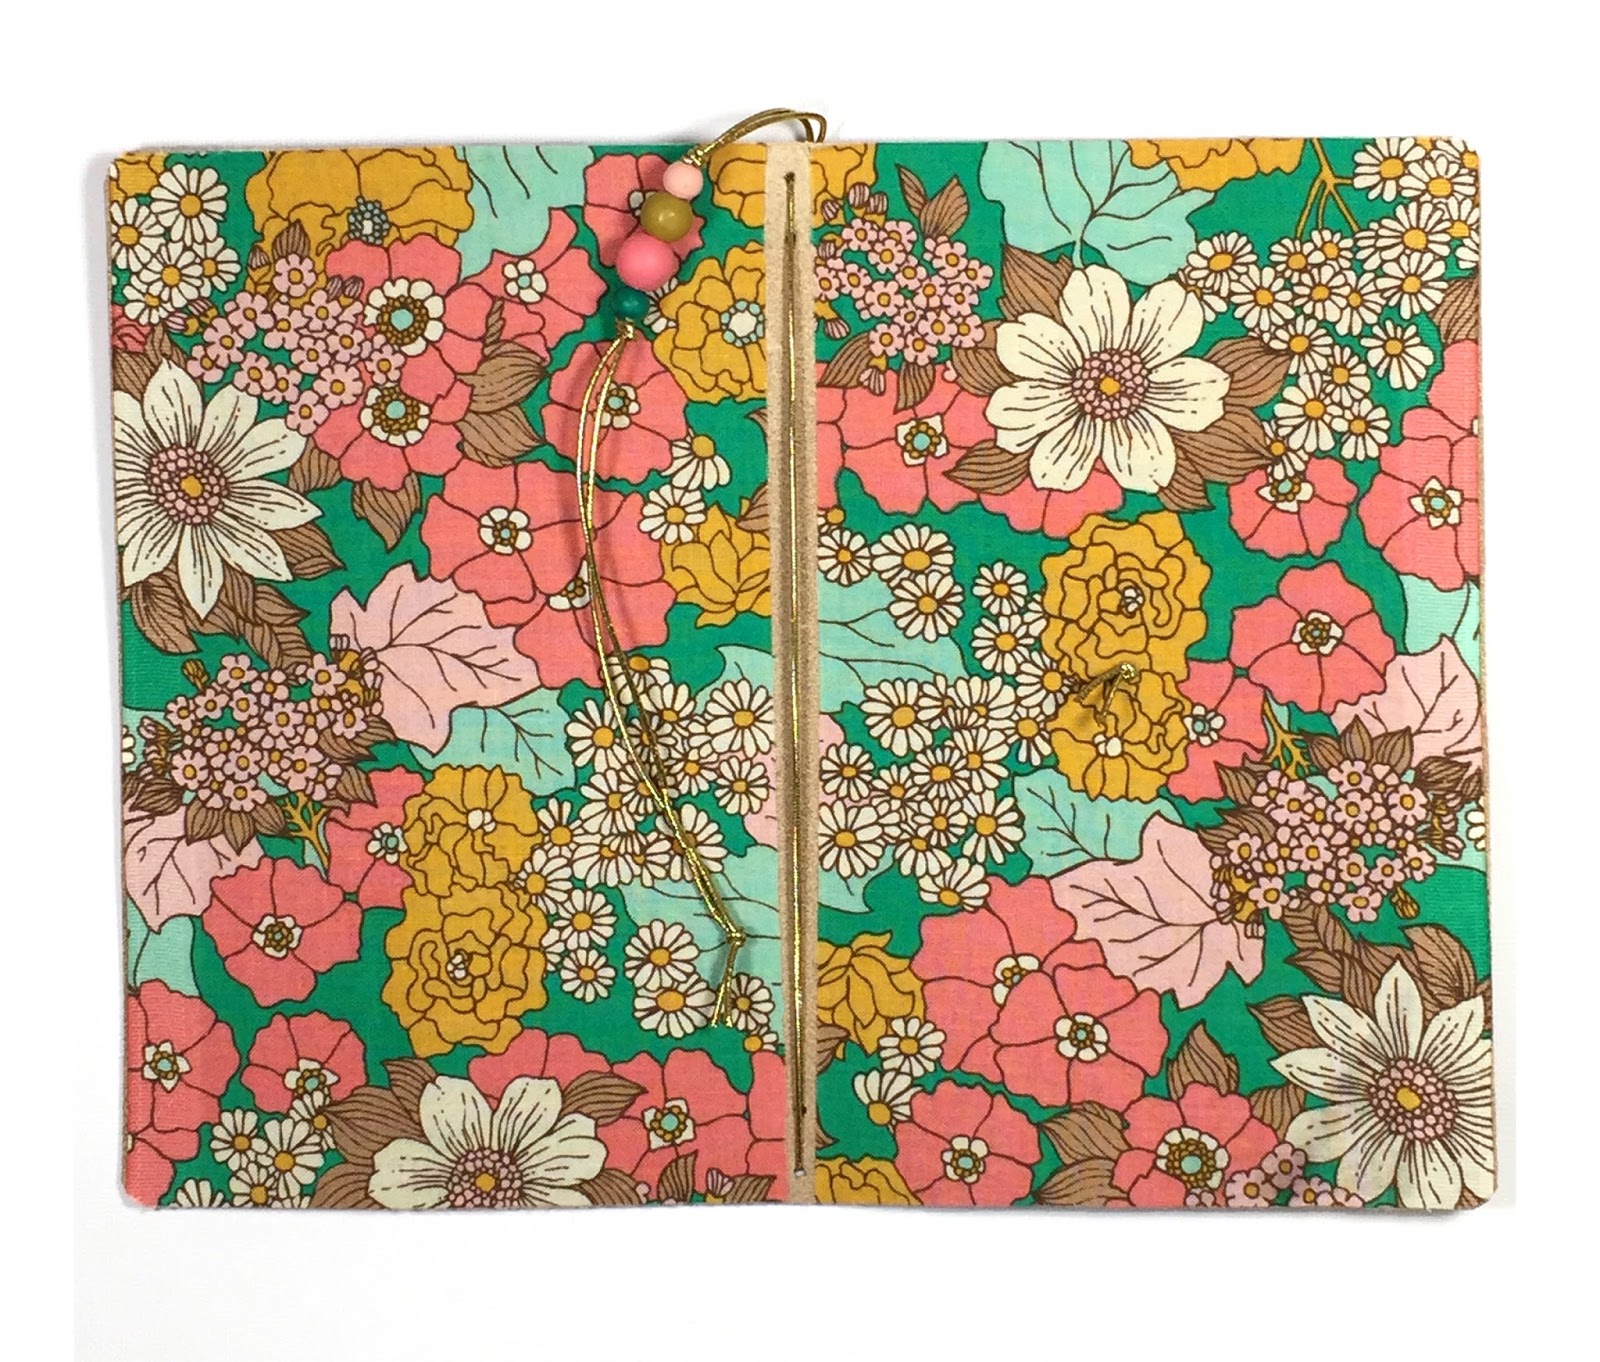
I like color & decided to bring in a little more personalization with fabric. (This fabric is Joel Dewberry's Bungalow.)  I cut (2) 8-1/2" x 5" pieces and applied Heat n Bond. (This is basically double sided adhesive for fabric that you apply with an iron.)
 Follow the package directions & iron the fabric onto the inside of the notebook.  I left some space in the middle because I didn't want my fabric to accidentally buckle/ripple when I closed the organizer.
 Find the center of the back flap of your organizer and create a hole through the leather using an awl or nail.  Starting from the inside, thread a piece of elastic cord through the leather & back to create a loop. (I left a long tail and stretched the elastic around my organizer to determine the appropriate length.)  Tie a knot and trim the ends of the elastic. *Elastic cord is very inexpensive (mine was $1.99) & can be found in any craft & hobby shop.
Using a ruler, measure and mark two holes on each end of your organizer.  (Mine were 1/4" & 3/4" on the center.)
 Punch holes to create the placement for the elastic bands in the center of your organizer.  I used a rotary punch, but you could also use an awl/nail again.  I do think the punch works really well & gives the TN a very professional appearance.  If you're going to make several of these, it might be worth the investment.
 Thread elastic cord through the top hole starting from the front of your TN and then through the bottom hole.
 Come back up through the remaining hole on the bottom and through the remaining hole on the top.
The ends of your cord should be coming out the top front of your TN.  You'll want to pull the cord somewhat snug until the leather just starts to curve upward.  (It will straighten out once closed, but this will allow your journals to be held in place.)

 You can tie off your elastic now & call it a day... or you can add some customization.  I decided to paint some wooden beads to coordinate with my fabric.  (I used a combination of Studio Calico's Color Theory paint, Liquitex heavy body, & Bear latex paint for these.)  Just use whatever you have on hand... but if you happen to have Liquitex paints, they are definitely my favorite!
I tied my beads in place and kept my elastic long in case I wanted to use it as a placeholder later.
If you feel like your organizer is a little stiff or isn't folding as well as you'd like, just spritz the entire cover with a little water & let it absorb.  This makes your leather much more pliable.  Just fold & place a heavy object on it for about 10 minutes.  I love how my TN turned out.  It feels very sturdy, yet soft to the touch.
 After I was finished with my organizer, I decided that I wanted to personalize it a bit.  I had some leather labels from this Inspirational Stamp Set (metal stamps that leave impressions in leather) and used Melody Ross' metal alphabet stamps to add my name.  I love it when I have things like this on hand!  It adds so much without adding any cost to the project.

I did have to untie my center elastic so that I could thread my name label onto it, so if you want to add anything onto your center cord, you might want to plan ahead and save yourself a step. ;)
 When using metal stamps, make sure to wet your leather first & let the leather soak in the water for a couple of seconds.  This will allow the leather to accept the impressions much more easily.
I couldn't be happier with how my traveler's notebook turned out & I hope you give it a try!

In my next blog post, I'll show you how to make your own notebook inserts to fill up your organizer.

Nov 15, 2014

Makers Gonna Make

We went from fall to winter overnight & although I dislike winter with a passion, I love the change in pace that it brings to our lives.  Cold weather makes me want to make.  It's like a fierce craving & I can't rest unless I give into it.  Of course, I love making things with paper, but while I'm waiting for my next kit to arrive, I love working with different mediums - like colorful fabrics, wool felt, and yarn.

If you follow me on Instagram you might have seen peeks of some projects I've been working on lately.  I have a new niece coming soon & I've been busy making things to fill her nursery.  (I'm making a few extras too that will be in a little pop up shop soon.)
These little dolls are very time consuming, but so fun to create.  I love their Mary Jane's and their sweet faces.  Their brother is pretty cute too, if I do say so myself.  :)  I'm addicted to buffalo plaid right now & thought he needed to have a trendy flannel in this print.
I'm also making a pack of dachshunds for my shop.  These are so soft & cuddly & I think they'll look adorable tucked in a little one's bed.
My sister's baby shower was a couple of weeks ago & I was frantically crocheting up to the last minute to get her baby blanket finished.  I think my fingers are still a little numb. ;)  I used a pattern from Very Pink to make this Granny Ripple blanket.  If you're interested in learning how to crochet, I highly recommend her site.  This was my first big crochet project & her video tutorials are so helpful!
 I also made her a couple of pillows to add to her nursery.  Her husband loves owls. :)
One of my favorite bloggers, Amanda Rydell, posted pictures of these adorable house pillows that she created.  I wasn't quick enough to snag one for myself, so I decided to make my own version.

I used stamps from a Studio Calico set as a template for my embroidery.
So, what about you?  Do you get the itch to craft when the weather turns cold?

Sep 8, 2014

The Whitman Kit + Screen Printing Ideas + New Color Theory Ink Colors

Whew!  That title is a mouthful, but I have SO much to share with you!  I made a quick video as I unpacked my new Whitman embellishment kit from Studio Calico.  I wanted to show you some ways to use the new screen print - YES, screen print - from the kit.  It's crazy cool!  I also stamped out some images using the newest 6 colors from the Color Theory ink collection.
I snapped a couple of quick photos of one of the projects I'm demoing in the video.  I *love* how the screen print worked with my Silhouette Fabric Inks on this canvas bag.


I forgot to mention it in the video, but to clean my screen print in between applications, I just washed it off in the sink & allowed it to air dry.

Here are the new ink colors in all their glory.  Pretty, huh?
Here's a photo that I snapped after stamping the images in the video. After the images dried, the Flamingo ink is definitely a vibrant "hot pink."

I hope this helped give you a better idea of what the Whitman kit is all about.  You can also find more inspiration in the September Creative Team gallery.

Aug 27, 2014

Paint Dipped Spoons + Canning Jars

A group of my friends get together every month for what we call our "crafty girls' night out."  We all bring some yummy munchies & some sort of craft/project to work on & just enjoy each others company.

I was trying to figure out what craft project I wanted to work on & remembered that my Color Theory acrylic paints had just arrived!
Let me just say, these paints rock!  The colors are so fresh & trendy... and they coordinate with all of the other Color Theory products. I got them with the intention of painting some of my wood veneer shapes (as well as many other things)... and then I had a light bulb moment.

I've seen some adorable painted spoons on Pinterest & decided to try to make them myself.  I bought some wooden utensil sets from the dollar store, packed a handful of colors of paint (Sunny Day, Coral Bay, Mint Hint & Clean Slate), a paintbrush & some washi & I was all set for our g.n.o.
Creating paint dipped spoons are extremely easy.  Here's the rundown:
  1. Apply tape to the utensils to mask the area where you want the paint line to stop.  I used washi tape because it's very easy to remove (and I couldn't find my painter's tape.)
  2. Paint the area of the utensils below the tape line.  I applied 3 thin coats, allowing the paint to dry in between coats.
  3. Spray the painted ends of utensils with a non-toxic sealer.  (I did two coats just to be sure.)
  4. Remove washi tape & reveal your awesome work!
One thing that I really loved about the Color Theory acrylics was how perfect the color remained after removing the tape.  I've removed painter's tape while doing some DIY projects around the house where portions of the paint had dried to the tape & peeled off, leaving a not-so-lovely paint line behind.  Not so with these paints!
These spoons are cute enough to be a gift all on their own (they look much more expensive than the $1 you spent on them) ;) but I thought I'd go a step further & use them as fancy schmancy gift packaging.
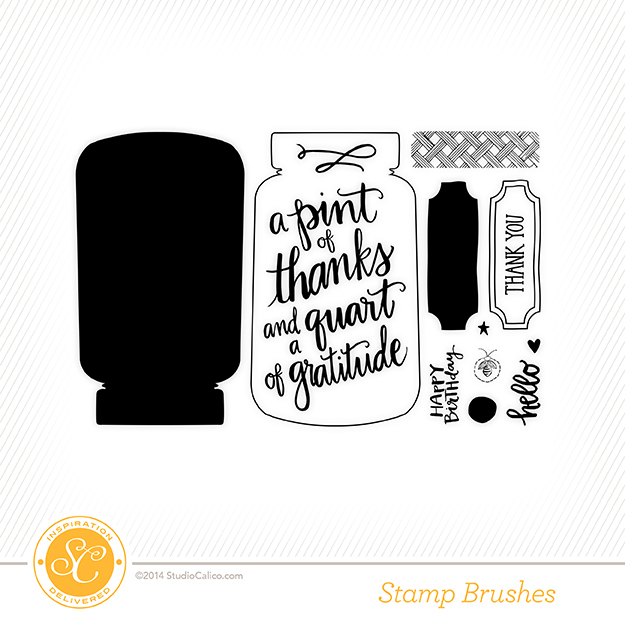
I love canning jars.  Maybe it's because I have so many happy memories of my grandma's canned fruits & vegetables?  I'm not sure... but I was so happy to see these Jar stamps from Studio Calico.
http://www.studiocalico.com/digital/digital-stamp-brushes/poet-society-card-add-on-stamp-2?aff=7ded1832
 I used the digital stamp set, which is great if you have Photoshop or Elements.  You can resize them to fit whatever project you're working on & just print them out onto cardstock or patterned paper.  These digi stamps are only available for the month of September.  (There is also a traditional acrylic stamp set if you're more of an ink & paper crafter.)
I hope you give these painted spoons a try!  Just fill your canning jar with a soup or cookie mix & you've got a thoughtful & adorable gift that anyone is sure to love.

This site has been Tweaked and Designed by Sara Williams | Powered by Blogger | Back to Top
 
Pin It button on image hover