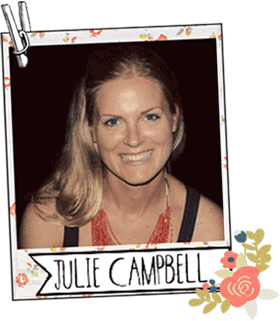
I'm so excited to share my very first projects as part of Studio Calico's new Creative Team! If you haven't heard, there are now 3 teams (the scrapbook team, card team & Project Life team.)
January's kits are now all up for grabs, so make sure to check them out & snag one if you can!
This is going to be a long post... so sit back, get your coffee in hand, and have a peek at my cards for this month. :)
This month, I designed with the card kit, the SC papers from the scrapbooking kit, the Project Life kit, and add-ons 1, 3 & 4.
I had a few extra cards from the Project Life kit & decided to incorporate one of them on a greeting card. I trimmed the "HELLO" card & layered it in between some of the word bubble paper from Add-on 4 (Woodbrooke Road.)
The stars peeking through are also from the PL kit. I added a strip of aqua paper from Add-on 3 (Pioneer Drive) to the side & some twine from the shop to add an extra punch of color.
This country girl fell head-over-heels for Add-on #1 (Pollard Avenue.) The Artisan Stars are so fun to work with! I just added a couple sprays of mist & the polka dot resist pops right through.
The sentiment was cut with my Silhouette using the font Marmelleta Jam & popped up with foam dots.
I love using bitty bags to add hidden surprises to my cards. Lift the shipping tag & you'll find a birthday message!
I used the backing from one of the Artisan Stars from Pollard Avenue as a mask & sprayed the white shipping tag with Silver Mister Huey's.
I added a lot of stamping here and there. The tag was stamped with images from the Block Party Card Kit. I inked one of the rectangular stamps from Pioneer Drive with orange chalk ink & stamped onto vellum to create a backdrop for the star badge on the front of the envelope. The tiny triangles from Pioneer Drive make a cool geometric pattern when stamped together (see bottom of card.)
I love giving gifts & dressing up packages for friends. I used the pocket from Block Party to hold a set of recipe cards that can either be a gift in themselves or attached to packages of baked treats.
The Project Life cards make perfect recipe cards & tags! I just added stickers, stamps & tabs to dress them up a bit. You can use the front of the cards for ingredients & the back for directions.
To make the front of the envelope a little more dressy, I printed a digital label from this month's set onto vellum & stitched it in place over a patterned paper band.
The printed vellum from the Block Party kit is just gorgeous... and it was the perfect backdrop for the focal point on this card. (I adhered the vellum to white cardstock to really make the pattern pop.)
The map is an image that I cut out of the patterned paper found in Woodbrooke Road (Add-on #3). I love the star stickers from the Project Life kit & added one to mark my place on the map.
The yellow twine is from this month's card kit & the pink twine is from the shop. The solid twine is just gorgeous!
I made the front of the card shorter than the back so that the patterned paper (from the card kit) would show through & really make a statement.
The paper from Woodbrooke Road (Add-on #4) is so scrumptious! With a house full of boys, it's great to have graphic, masculine themed paper on hand.
The Apricot & Mustard Zing embossing powder coordinates perfectly with the kits this month. The Artisan Stars from Pollard Avenue have an adhesive backing. I just turned the star over & applied some embossing powder directly to the adhesive & heat set. The embossed circles are from the stamp set in Add-on #4.
The sentiment is part of the January Card Kit.
This is my "Card Kit Only" project this month.
The cut files this month are so fun! I love the retro feel of the numbers. I cut my main image out of patterned paper & cardstock & layered it with foam adhesive to make it stand out. This month's Card Kit has THE coolest patterned paper.
The word "HAPPY" is a stamp from the card kit as well. I love how clear stamps can be curved to fit just about anywhere.
I added splashes of white mist here & there to add to the design.
What kid wouldn't like a little birthday "moo"la? The Snap pockets from Add-on 4 (Woodbrooke Road) make the perfect money holder!
I stamped an orange square using the Pioneer Drive stamp set & then stamped a cow on top of it (Pollard Avenue.) The "birthday" stamp is part of the card kit & the arrow is from Woodbrooke Road as well.
I added letter stickers & border stickers from Pioneer Drive & twine & patterned paper from the Block Party card kit to finish it off.
Shwew! If you're still with me, thank you so much for checking out my projects. It's been such a blast & these kits are just perfect! I loved every minute of it!
Shopping Links:


I think all I can say is WOW!
ReplyDeleteSuch fantastic cards!
ReplyDelete